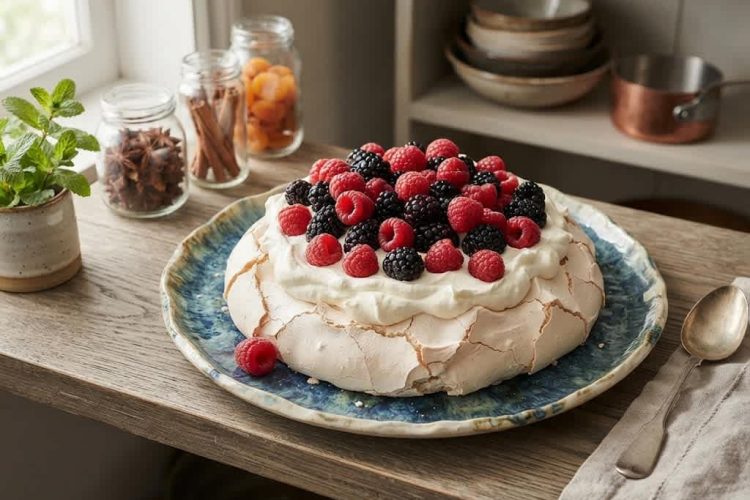
Vanilla Berry Pavlova is an elegant yet surprisingly simple dessert made with a crisp baked meringue shell, soft marshmallow-like center, creamy vanilla bean whipped cream, and a generous topping of fresh berries. Its combination of textures makes every bite special.
The outside has a delicate crunch, while the middle stays tender and chewy. Finished with colorful berries and lightly sweetened cream, this easy berry pavlova is perfect for spring gatherings, summer celebrations, afternoon entertaining, holidays, and special family dinners.
Unlike many impressive-looking desserts, pavlova does not require complicated pastry techniques or a long list of ingredients. The most important part is learning how to prepare and bake the meringue correctly. Egg whites are slowly whipped with sugar until they become thick, glossy, and stable.
The mixture is then shaped into a round shell and baked gently at a low temperature. Once cooled, the pavlova becomes a beautiful base for vanilla whipped cream and fresh fruit.
What Makes Berry Pavlova Special
The defining feature of pavlova is its contrast in texture. A properly baked pavlova should have a dry, crisp exterior while remaining soft and almost marshmallow-like inside. This is different from a traditional crisp meringue, which is generally dry and crunchy throughout. The creamy whipped topping and juicy berries add another layer of contrast, creating a dessert that feels light despite its rich and satisfying flavor.
The meringue itself has a delicate sweetness that works particularly well with fresh fruit. Berries provide natural tartness and freshness, helping balance the sugar in the meringue. Raspberries, blueberries, blackberries, and strawberries all work beautifully. You can use one type of berry or combine several varieties to create a colorful topping. The result is a dessert that looks festive without requiring elaborate decoration.
How Pavlova Gets Its Unique Texture
Pavlova and classic meringue share many of the same basic ingredients, but the preparation and baking method create a noticeably different final texture. When egg whites are beaten, air becomes trapped inside them. Sugar is gradually incorporated to stabilize the foam and create a smooth, glossy meringue. The longer and more carefully the mixture is whipped, the more structure it develops.
For this berry pavlova recipe, the meringue is shaped into a large circular shell with raised edges and a shallow center. That center acts like a bowl for the vanilla whipped cream and berries. Baking at a low temperature allows the exterior to become firm without quickly coloring the meringue. After baking, cooling the pavlova slowly helps it maintain its structure and develop the characteristic crisp outside and soft center.
Choosing the Right Eggs
Room-temperature eggs are particularly useful when preparing meringue because the whites can whip into a stable, airy mixture. When separating the eggs, take care not to allow any yolk to enter the whites. Even a small amount of egg yolk can make it difficult to achieve the volume needed for a strong meringue.
For the best results, use a completely clean and dry mixing bowl and whisk attachment. Any moisture, grease, or residue can interfere with the whipping process. A glass or metal bowl is especially useful for meringue preparation. Allowing the eggs to reach room temperature before mixing can also help the whites become light and voluminous.
Why Sugar Should Be Added Gradually
One of the most important steps in making homemade pavlova is adding the granulated sugar slowly. Rather than adding all of the sugar at once, it is incorporated gradually while the egg whites are being whipped. This gives the sugar time to dissolve into the developing meringue and helps create a smooth, glossy texture.
The finished mixture should look thick and shiny rather than grainy. If the sugar has not dissolved properly, the baked pavlova may have an uneven texture. Superfine sugar can be especially convenient because its smaller crystals dissolve more readily, but the recipe uses granulated sugar and should be prepared according to the stated ingredient list.
Preparing the Pavlova Shell
Once the meringue reaches stiff peaks, it is ready to shape. A nine-inch circle drawn on parchment paper provides a useful guide for creating an evenly sized pavlova. Place the parchment with the drawn side underneath so the pencil or marker does not touch the food.
Spoon the meringue onto the center of the parchment and spread it toward the edges of the circle. The goal is not to create a perfectly smooth surface. Gentle swirls and natural ridges can make the finished pavlova look attractive and homemade. Build the outside edge slightly higher than the center, leaving a noticeable dip where the whipped cream and fruit will later be placed.
Baking a Crisp and Chewy Pavlova
The pavlova should be baked at a low temperature rather than exposed to intense heat. This slow baking process helps dry and firm the exterior while allowing the center to remain soft. The shell should be firm and dry when finished, but it should not become noticeably brown.
Every oven behaves slightly differently, so watching the appearance of the meringue is important. Avoid opening the oven repeatedly during baking because sudden temperature changes can affect the delicate structure. Once the baking time is complete, turning off the oven and allowing the pavlova to cool inside gives it a gradual transition from hot to cool.
Why Cooling Matters
Cooling is one of the most overlooked parts of making a successful pavlova. The baked meringue is delicate, and a sudden change in temperature can cause cracks or structural changes. Allowing it to cool gradually in the turned-off oven gives the shell time to settle.
A pavlova may develop some cracks as it cools, and this is not necessarily a problem. The whipped cream and fresh berries cover much of the surface, so small cracks can become part of the dessert’s natural appearance. The most important goal is maintaining the crisp outer shell and soft center.
Making Vanilla Bean Whipped Cream
The vanilla bean whipped cream gives this berry pavlova its creamy and fragrant finishing layer. Start by splitting the vanilla bean lengthwise with a sharp paring knife. Scrape out the tiny vanilla seeds and reserve them for the cream.
Cold heavy whipping cream should be beaten until it begins to thicken before increasing the mixer speed. Once the cream has started to develop body, vanilla bean and powdered sugar can be incorporated. Stop whipping when the cream reaches the desired consistency between soft and firm peaks. It is important not to continue mixing for too long because over-whipped cream can become grainy and eventually start turning into butter.
Choosing Fresh Berries
Fresh berries are the easiest way to finish a pavlova beautifully. Strawberries, raspberries, blueberries, and blackberries offer different colors, textures, and levels of sweetness. A mixture creates a particularly attractive presentation, making this dessert suitable for parties and celebrations.
Choose berries that look fresh and firm. Wash them carefully and allow excess water to drain before placing them on the whipped cream. Too much moisture can soften the meringue, especially if the dessert sits for a long time before serving. For the best texture, assemble the pavlova close to serving time.
How to Assemble Berry Pavlova
Once the pavlova shell has completely cooled, carefully transfer it to a serving plate if needed. Spoon the vanilla bean whipped cream into the center and spread it gently across the surface. You can create decorative swirls with the back of a spoon without needing any special piping equipment.
Arrange the fresh berries over the cream. They can be scattered casually for a relaxed homemade appearance or arranged more deliberately for a special occasion. The bright colors of the berries against the white cream and pale meringue create an impressive presentation with very little effort.
Optional Flavor Ideas
Although fresh berries and vanilla whipped cream are enough to make an excellent dessert, pavlova is flexible enough to accommodate additional toppings. A spoonful of lemon curd can introduce a bright citrus flavor that contrasts beautifully with the sweet meringue. Strawberry or raspberry coulis can also be drizzled over the finished dessert for extra fruit flavor and visual appeal.
These additions are optional and do not need to be included if you want to keep the dessert simple. The natural combination of vanilla, cream, and fresh berries already provides a balanced flavor profile. If you do add a fruit sauce or curd, use it sparingly so the meringue does not become overwhelmed by moisture.
When to Serve Vanilla Berry Pavlova
This easy pavlova recipe is particularly suitable for occasions when you want a dessert that looks impressive without requiring complicated decoration. It can be served at family dinners, afternoon gatherings, birthday celebrations, summer parties, holiday meals, and special occasions.
Because pavlova has a light and airy appearance, it can be a refreshing alternative to heavier cakes and rich baked desserts. Fresh berries also make it especially appealing during warmer months when colorful seasonal fruit is readily available.
Notes for a Successful Pavlova
For reliable results, make sure the mixing bowl and whisk are completely clean and dry before beginning. Separate the eggs carefully, add the sugar gradually, and continue whipping until the meringue becomes thick and glossy. The cream of tartar helps support the meringue structure, while the low oven temperature allows the shell to dry without excessive browning.
The finished pavlova should be assembled shortly before serving whenever possible. The longer whipped cream and berries remain on the meringue, the more moisture can migrate into the crisp shell. If the pavlova develops a few cracks during cooling, do not discard it. Cracks are common with this dessert and can easily be hidden beneath the whipped cream and berries.
Frequently Asked Questions About Berry Pavlova
Can pavlova be prepared ahead of time?
The baked pavlova shell can be prepared ahead and allowed to cool completely. For the best texture, add the vanilla whipped cream and berries close to serving time. This helps preserve the crisp exterior of the meringue and prevents the fruit and cream from making the shell too soft.
Why does pavlova crack?
Pavlova can crack because the meringue is delicate and responds to changes in temperature and moisture. Small cracks are normal and do not mean the dessert has failed. A gradual cooling process can help reduce excessive cracking, while the cream and berries naturally conceal minor imperfections.
Can different berries be used?
Yes. The recipe works beautifully with an assortment of fresh berries. Strawberries, raspberries, blueberries, and blackberries can be used individually or combined. The important consideration is using fresh fruit and avoiding excessive moisture when decorating the pavlova.
What should the center of pavlova feel like?
A successful pavlova should have a firm, crisp exterior and a soft, chewy, marshmallow-like center. This contrast is one of the main characteristics that separates pavlova from a completely crisp meringue dessert.
Vanilla Berry Pavlova Desserts
 Recipe by admin1
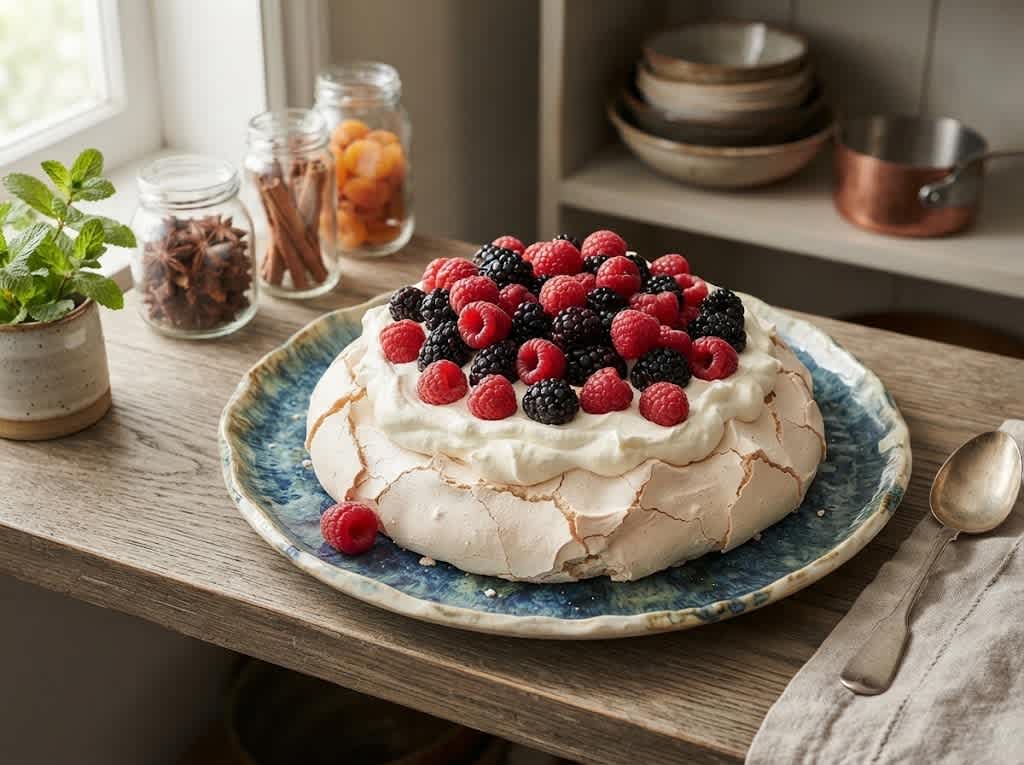
An elegant berry pavlova featuring a crisp meringue shell with a soft, chewy center, topped with homemade vanilla bean whipped cream and an assortment of fresh berries.
6
servings20
minutes1
hour30
minutes1
hour50
minutesIngredients
- For the Meringue Shell
3 large eggs, at room temperature
¾ cup granulated sugar
¼ teaspoon cream of tartar
Pinch of salt
½ teaspoon vanilla extract
- For the Vanilla Bean Whipped Cream
2 cups heavy whipping cream, cold
3 tablespoons powdered sugar
1 vanilla bean
1–2 pints fresh berries
Directions
- Add the egg whites and vanilla extract to a large mixing bowl or stand mixer. Using the whisk attachment or an electric mixer, beat the egg whites on low speed until bubbles begin to form, which can take up to 5 minutes.
- Increase the mixer speed to medium and continue beating for approximately 5 minutes, or until soft peaks begin to form.
- Reduce the mixer speed to low. Add the granulated sugar gradually, approximately one tablespoon at a time, allowing each addition to become incorporated before adding more.
- Increase the speed to medium and continue whipping until the mixture becomes thick and glossy. This can take up to 10 minutes.
- Add the cream of tartar and salt. Increase the speed to high and continue beating for another 1–2 minutes, or until stiff peaks form.
- Preheat the oven to 250°F. Position the oven rack in the center. Draw a 9-inch circle on a piece of parchment paper, then turn the parchment over and place it on a baking sheet.
- Spoon the meringue onto the parchment and use a rubber spatula or offset spatula to spread it toward the edge of the marked circle. Build up the sides while creating a large dip in the center. This center will hold the whipped cream and berries.
- Bake for approximately 1 hour 15 minutes to 1 hour 30 minutes, or until the shell feels firm and dry without becoming brown.
- Turn off the oven and allow the pavlova shell to cool inside the dry oven for at least 1 hour and up to overnight. In a dry climate, it can instead be cooled on a cooling rack outside the oven.
- Using a sharp paring knife, split the vanilla bean lengthwise. Scrape out the vanilla bean flecks with a small spoon and set them aside.
- Using a clean whisk attachment, beat the cold heavy whipping cream on medium speed. Once it begins to thicken, increase the speed to high.
- When the cream is still slightly soft, stop the mixer and add the vanilla bean flecks and powdered sugar. Continue mixing until the cream reaches a consistency between soft and firm peaks. Avoid over-whipping.
- Once the pavlova shell has completely cooled, spoon the vanilla bean whipped cream over the top. Use the back of a spoon to create decorative swirls.
- Top the whipped cream with an assortment of fresh berries, such as raspberries, blueberries, blackberries, and/or strawberries.
- For an extra-special finish, add homemade lemon curd or strawberry or raspberry coulis. Serve immediately for the best contrast between the crisp meringue, creamy topping, and fresh berries.


