There’s nothing quite like the aroma of freshly baked bread filling your kitchen. If you thought gluten-free bread was difficult to make, this recipe will prove otherwise. This Easy No-Knead Gluten-Free Bread requires no special skills, no kneading, and no complicated equipment. Simply mix the ingredients, let the dough rise, and bake until golden brown.
Unlike traditional bread, gluten-free dough doesn’t rely on gluten development, so kneading isn’t necessary. Instead, the dough stays soft and sticky while the yeast creates a light, airy texture during the rising process. Baking the loaf in a hot Dutch oven traps steam, creating a crisp artisan-style crust while keeping the inside tender, moist, and fluffy.
Whether you’re baking for someone with gluten intolerance, celiac disease, or simply looking for a delicious homemade gluten-free loaf, this recipe is an easy and reliable choice.
Why You’ll Love This Recipe
- No kneading required
- Easy enough for beginners
- Crispy golden artisan crust
- Soft, moist, and fluffy interior
- Made with simple pantry ingredients
- Perfect for sandwiches, toast, and soups
- Freezes beautifully for later
Ingredients
Dry Ingredients
2½ cups gluten-free flour blend
Use a high-quality gluten-free all-purpose flour blend that contains xanthan gum. If your flour blend doesn’t include xanthan gum, add about 1 teaspoon to help improve the texture and hold the loaf together.
2¼ teaspoons instant yeast
One standard packet of instant yeast helps the bread rise and gives it a light texture. Make sure your yeast is fresh for the best results.
1½ teaspoons salt
Salt enhances the flavor of the bread and helps control the yeast during fermentation.
1 tablespoon sugar or honey
A small amount of sugar or honey feeds the yeast, helping it activate and giving the crust a beautiful golden color.
Wet Ingredients
1½ cups warm water
The water should be warm, around 105–110°F (40–43°C). Water that is too hot can kill the yeast, while cold water will slow the rising process.
2 tablespoons olive oil
Olive oil adds moisture, creates a softer crumb, and helps the bread stay fresh longer.
1 teaspoon apple cider vinegar
Apple cider vinegar strengthens the dough, improves the rise, and creates a softer interior.
Equipment Needed
- Large mixing bowl
- Wooden spoon or silicone spatula
- Measuring cups and spoons
- Parchment paper
- Dutch oven with lid
- Cooling rack
Step-by-Step Instructions
Step 1: Mix the Dry Ingredients
Place the gluten-free flour, instant yeast, salt, and sugar into a large mixing bowl.
Whisk everything together for about 30 seconds until evenly combined. Mixing the dry ingredients first ensures the yeast is distributed evenly throughout the dough.
Step 2: Add the Wet Ingredients
Pour the warm water, olive oil, and apple cider vinegar into the bowl.
Using a wooden spoon or sturdy spatula, stir until all of the flour is incorporated.
The dough should look thick, sticky, and slightly shaggy. This is completely normal for gluten-free bread.
If the dough feels too dry, stir in 1–2 tablespoons of warm water.
If it seems very runny, add 1–2 tablespoons of gluten-free flour.
Step 3: Let the Dough Rise
Cover the bowl with plastic wrap or a clean kitchen towel.
Place it in a warm, draft-free area.
Allow the dough to rise for:
- 2–3 hours for a quicker loaf
- 8–12 hours for deeper flavor and a lighter texture
The dough is ready when it has increased slightly in size and small bubbles appear on the surface.
Step 4: Preheat the Dutch Oven
About 30 minutes before baking, place the Dutch oven and lid inside your oven.
Preheat the oven to 450°F (230°C).
A thoroughly heated Dutch oven creates steam during baking, producing a crisp, bakery-style crust.
Step 5: Shape the Dough
Lay a sheet of parchment paper on your work surface.
Scrape the dough onto the parchment.
Wet your hands slightly and gently fold the edges toward the center once or twice to form a round loaf.
Do not knead or press the dough down.
Step 6: Bake
Carefully remove the hot Dutch oven from the oven.
Lift the parchment paper with the dough and lower it into the pot.
Cover with the lid.
Bake for 35 minutes.
Remove the lid.
Continue baking for another 10–15 minutes, until the crust is deep golden brown.
The bread is fully baked when:
- The crust is firm and crisp.
- The loaf sounds hollow when tapped.
- The internal temperature reaches 205–210°F (96–99°C) if using a thermometer.
Step 7: Cool Completely
Transfer the loaf to a cooling rack.
Allow it to cool for at least 1 hour before slicing.
Cutting the bread too early can make the inside gummy because the crumb hasn’t finished setting.
Helpful Tips
- Always measure flour accurately using a spoon and level method.
- Make sure your yeast is fresh and active.
- Warm water helps activate the yeast properly.
- Don’t skip the Dutch oven—it creates a crisp crust.
- Wet hands make sticky dough easier to handle.
- Letting the dough rise overnight develops a richer flavor.
- Cooling completely before slicing gives the best texture.
- Store leftovers in an airtight container to keep the bread fresh.
Recipe Variations
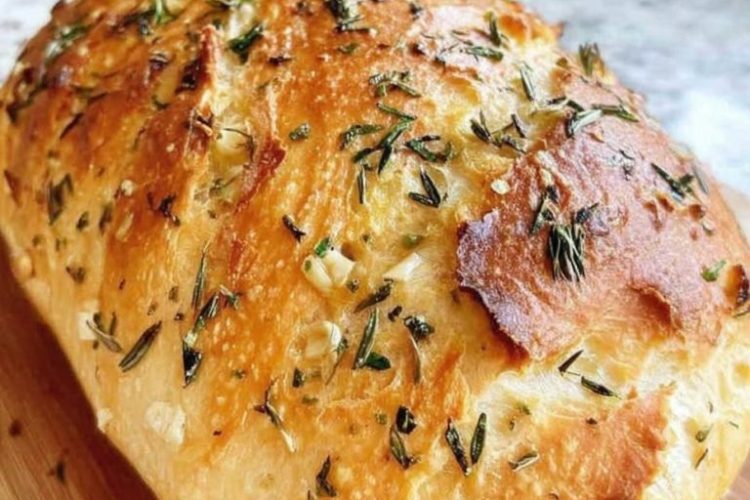
Herb Bread
Mix in:
- 1 teaspoon dried rosemary
- 1 teaspoon dried thyme
- ½ teaspoon garlic powder
Perfect for serving with soups and pasta.
Seeded Bread
Add:
- 1 tablespoon sunflower seeds
- 1 tablespoon pumpkin seeds
- 1 tablespoon sesame seeds
- 1 tablespoon flaxseeds
The seeds add crunch, nutrition, and a rustic appearance.
Cheesy Garlic Bread
Mix into the dough:
- ½ cup shredded cheddar cheese
- ½ teaspoon garlic powder
- ½ teaspoon onion powder
This variation makes a flavorful sandwich loaf.
Everything Bagel Bread
Sprinkle the top with:
- Sesame seeds
- Poppy seeds
- Dried onion flakes
- Dried garlic flakes
- Coarse salt
It bakes into a delicious loaf with a savory crust.
Sweet Cinnamon Raisin Bread
Fold into the dough:
- ½ cup raisins
- 1 teaspoon cinnamon
- 1 tablespoon brown sugar
Perfect for breakfast or French toast.
Serving Suggestions
This homemade bread is delicious in many ways:
- Toasted with butter and jam
- Avocado toast
- Peanut butter and honey
- Grilled cheese sandwiches
- Turkey or chicken sandwiches
- Served with soup or chili
- Alongside pasta dishes
- Dipped in olive oil and balsamic vinegar
- Made into garlic bread
- Used for French toast or bread pudding
Storage Instructions
Room Temperature
Store the bread in an airtight container or bread bag for up to 2 days.
Refrigerator
Keep refrigerated for up to 5 days. Toast slices before serving for the best texture.
Freezer
Slice the loaf before freezing. Place parchment paper between slices and freeze in a freezer-safe bag for up to 2 months.
To enjoy, thaw at room temperature or toast directly from frozen.


