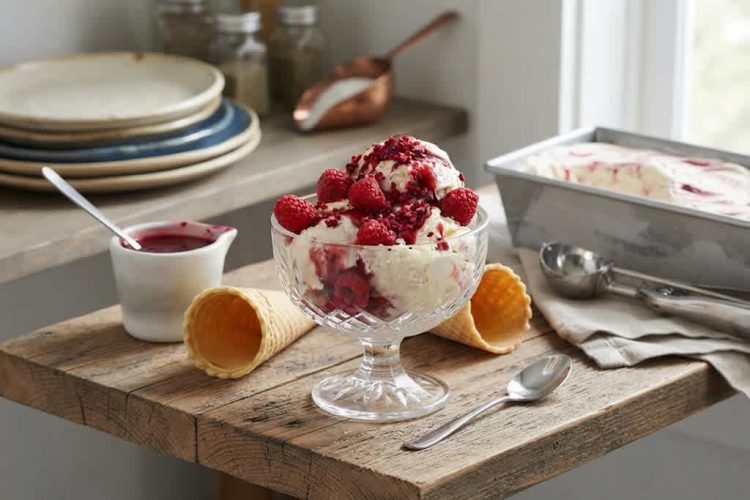
Raspberry Ripple Ice Cream is a creamy, fruity homemade dessert that combines smooth vanilla ice cream with a bright raspberry coulis running through every spoonful. This easy no-churn ice cream recipe is ideal when you want homemade ice cream without buying an ice cream machine or spending hours preparing a traditional custard base.
The contrast between sweet, creamy vanilla and slightly sharp raspberries makes this frozen dessert especially refreshing during warm weather.
The best part of this raspberry ice cream recipe is its straightforward preparation. Instead of making a traditional custard with eggs and carefully controlling the temperature, the ice cream base is made with double cream, condensed milk, and vanilla extract.
The cream is whipped until soft and airy, then combined with condensed milk to create a rich mixture that freezes beautifully. Once the raspberry sauce is added in layers, the mixture is ready for the freezer.
Why Make No-Churn Raspberry Ice Cream?
Traditional ice cream often requires an ice cream maker to churn the mixture while it freezes. Churning helps create a smooth texture by preventing large ice crystals from forming. While this method can produce excellent results, not everyone owns an ice cream machine. A no-churn recipe offers a much simpler alternative, making homemade ice cream accessible with basic kitchen equipment.
This recipe uses whipped double cream to provide the structure and richness normally associated with churned ice cream. Condensed milk adds sweetness while also helping create a soft, creamy consistency. Because the ingredients are combined without complicated cooking techniques, this is a useful homemade dessert for beginners. You can prepare the mixture, layer it with raspberry coulis, freeze it, and return later when you are ready to serve.
The Creamy Vanilla Ice Cream Base
The foundation of this dessert is a simple vanilla ice cream mixture. Double cream is whipped with vanilla extract until it reaches soft peaks. This step is important because the whipped cream gives the finished ice cream a light texture rather than creating a dense frozen block. The condensed milk is then gently folded through the whipped cream so the mixture stays thick and airy.
Vanilla extract adds a warm, delicate flavor that balances the sharpness of the raspberry sauce. Although raspberry is the main flavor in this recipe, vanilla gives the ice cream base greater depth and makes the finished dessert taste more rounded. The combination of vanilla and berries is classic because the creamy sweetness of vanilla allows the natural fruit flavor to remain noticeable without overpowering it.
How to Make Raspberry Coulis
The raspberry ripple begins with a simple raspberry coulis made from raspberries and caster sugar. The berries are heated with the sugar until they soften and release their juices. As the mixture cooks, the raspberries become saucy and easy to break down with a fork or spoon. This creates a concentrated fruit sauce that can be layered through the ice cream.
After cooking, the raspberry mixture can be blended until smooth and then passed through a sieve. Straining removes the seeds and larger pieces of fruit, leaving a silky raspberry sauce. If you do not have a blender, the softened raspberry mixture can still be pushed through a sieve. The result may be slightly smaller in quantity, but it will still provide the sweet and tangy fruit flavor needed for the ripple.
Fresh or Frozen Raspberries
Fresh raspberries are an excellent choice when they are readily available, but frozen raspberries can also be used. Frozen fruit may release more liquid as it heats, so the finished coulis can sometimes be slightly thinner. Allowing the sauce to cool completely before assembling the ice cream is important because warm fruit sauce can affect the texture of the whipped cream mixture.
The natural tartness of raspberries works particularly well in this dessert. The ice cream base is rich and sweet, while the raspberry coulis provides acidity and fruitiness. Rather than mixing the raspberries completely into the cream, the coulis is added in separate layers and swirled through the mixture. This keeps the raspberry flavor distinct and creates the attractive ripple pattern associated with this style of ice cream.
Creating the Raspberry Ripple Effect
The visual appeal of raspberry ripple ice cream comes from the way the fruit sauce is layered into the vanilla base. Instead of stirring the coulis throughout the entire mixture, a portion of ice cream is placed into the storage container first. Small amounts of raspberry coulis are then added before being gently swirled with a skewer or fork.
This process is repeated as the remaining ice cream mixture is added. The goal is not to completely blend the raspberry sauce into the cream. Gentle swirling creates ribbons of raspberry throughout the vanilla ice cream. When the frozen dessert is eventually scooped, each serving should contain a mixture of creamy vanilla ice cream and colorful raspberry streaks.
Choosing the Right Freezer Container
A loaf tin works particularly well for homemade ice cream because its long, narrow shape makes the mixture easy to layer and scoop. However, you do not need a special ice cream container for this recipe. Any clean, freezer-safe container with enough capacity for the mixture can work.
A container with a suitable lid is useful because it helps protect the ice cream from freezer odors and reduces the formation of ice crystals on the surface. If your container does not have a tight-fitting lid, cover the surface securely before freezing. Keeping the ice cream well covered also helps preserve the raspberry and vanilla flavors.
How Long Should Homemade Ice Cream Freeze?
This no-churn raspberry ripple ice cream needs at least four hours in the freezer before serving. However, freezing time can vary depending on the temperature of your freezer, the size of the container, and how much mixture is being frozen. For the best texture, allow enough time for the center of the dessert to become properly firm.
Homemade ice cream may feel firmer than commercially produced ice cream when first removed from the freezer. This is normal. Commercial ice creams often contain ingredients designed to maintain a softer scoopable texture. This homemade version has a straightforward ingredient list, so allowing it to sit at room temperature for approximately 10 to 15 minutes before serving makes scooping much easier.
How to Serve Raspberry Ripple Ice Cream
There are plenty of simple ways to serve this homemade raspberry ice cream. For a classic presentation, scoop it into cones and add a little extra raspberry coulis over the top. Freeze-dried raspberries can also provide a decorative finish and an additional burst of fruit flavor.
For a more traditional dessert, serve the ice cream in bowls or dessert glasses. A small drizzle of raspberry sauce makes the presentation more colorful without requiring complicated decoration. The ice cream can also be used as part of a larger dessert, served alongside cake, brownies, fresh berries, or other homemade treats.
Making a Raspberry Ice Cream Milkshake
This ice cream can also be turned into a rich raspberry milkshake. Simply combine scoops of the frozen ice cream with milk and blend until smooth. Because the ice cream already contains raspberry coulis and vanilla, you do not need to add many extra ingredients to create a flavorful drink.
For a stronger raspberry flavor, an additional spoonful of cooled raspberry coulis can be added to the blender or drizzled inside the serving glass before pouring in the milkshake. This is an easy way to use leftover ice cream when you want something different from a traditional scoop.
Easy Flavor Variations
Although this recipe focuses on raspberry ripple ice cream, the same fruit-coulis method can be adapted to other berries. Strawberries, blackberries, and blueberries can all create different versions of the dessert. The basic approach remains the same: cook the fruit with sugar, soften it, blend if desired, strain it, and cool it before layering with the vanilla ice cream.
Using different fruits can also change the color and flavor of the finished dessert. Strawberries provide a softer and sweeter fruit profile, while blackberries tend to offer a deeper color and more pronounced tartness. Blueberries create a rich purple-blue ripple and pair naturally with the creamy vanilla base. The ice cream method itself does not need to change.
Keeping the Ice Cream Creamy
The texture of no-churn ice cream depends heavily on how the cream is handled. The double cream should be whipped only until soft peaks form. Once the condensed milk is added, fold it through gently rather than mixing aggressively. Overworking the mixture can cause the whipped cream to lose some of its volume, which can make the final texture less light.
The raspberry coulis should also be completely cool before it is added to the ice cream. Warm sauce can soften the cream mixture and interfere with the layering process. Preparing the coulis first gives it enough time to cool in the refrigerator while you move on to preparing the vanilla ice cream base.
Storage and Shelf Life
Keep the raspberry ripple ice cream covered in the freezer whenever it is not being served. Properly stored, the ice cream can last for up to three months, although the best quality is generally enjoyed sooner. For the freshest texture and flavor, eating it within about one month is recommended.
Try to avoid repeatedly leaving the entire container out of the freezer for long periods. Instead, remove only the amount you plan to serve and return the remaining ice cream to the freezer promptly. This helps maintain its texture and reduces unnecessary temperature changes.
Why This Recipe Works
This easy raspberry ripple ice cream works because each component has a clear purpose. The double cream provides richness and structure, condensed milk supplies sweetness and contributes to the creamy texture, and vanilla extract brings warmth to the base. The raspberry and sugar mixture provides the bright fruit element that cuts through the richness of the cream.
The no-churn method also keeps the preparation practical. There is no custard to cook, no eggs to temper, and no ice cream machine to operate. Once the raspberry coulis is prepared and cooled, the remaining steps are mainly whipping, folding, layering, and freezing. That makes this recipe particularly suitable for home cooks looking for an easy homemade ice cream recipe.
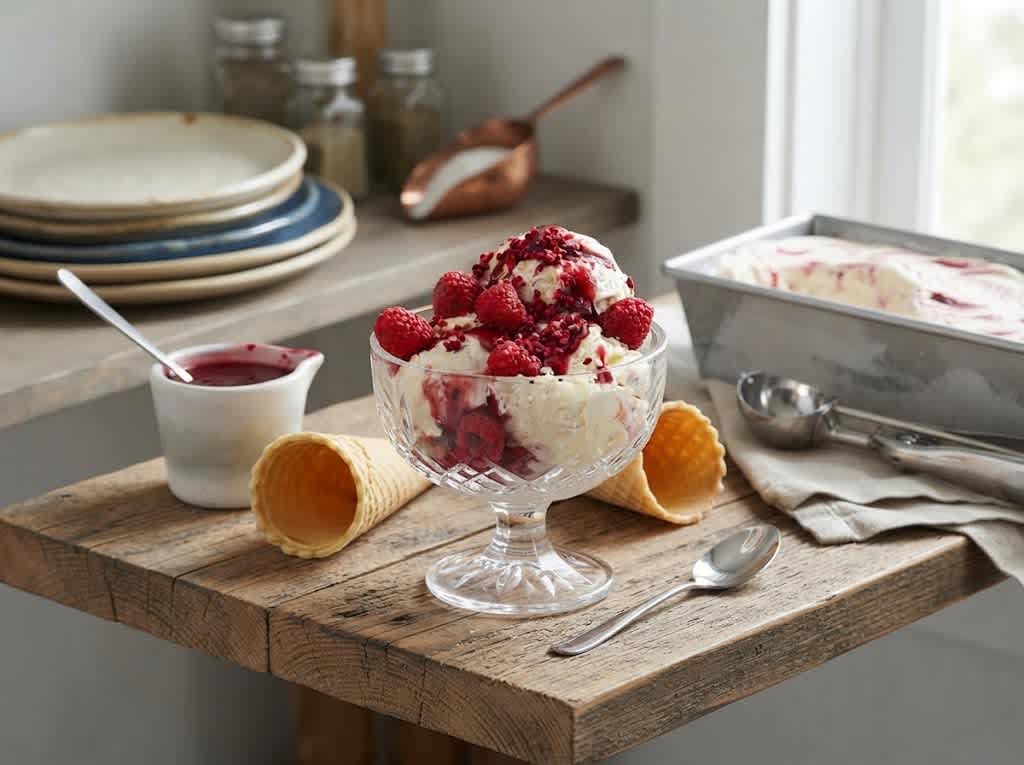
Raspberry Ripple Ice Cream
 Recipe by admin1
Creamy no-churn raspberry ripple ice cream made with rich double cream, sweet condensed milk, vanilla, and homemade raspberry coulis.
10
servings10
minutes20
minutes4
hours4
hours30
minutesIngredients
- Raspberry Coulis
300 g raspberries
100 g caster sugar
- Vanilla Ice Cream
600 ml double cream
397 g condensed milk (one tin)
1 tsp vanilla extract
Directions
- Prepare the Raspberry Coulis
- Wash the raspberries thoroughly and drain them well.
- Place the raspberries and caster sugar in a saucepan.
- Heat over medium heat, stirring occasionally as the fruit softens and releases its juices.
- Gently mash the raspberries with a fork or spoon while they cook.
- Continue heating until the sugar has dissolved and the mixture has developed a thick, saucy consistency.
- Blend the raspberry mixture until smooth if you have a blender available.
- Pass the mixture through a fine sieve to remove the seeds and larger pieces.
- Allow the raspberry coulis to cool completely, then refrigerate it until needed.
- Make the Vanilla Ice Cream
- Add the double cream and vanilla extract to a large bowl or stand mixer.
- Whip until soft peaks form. Do not over-whip the cream.
- Add the condensed milk to the whipped cream.
- Gently fold the condensed milk through the cream until evenly combined while keeping the mixture thick and airy.
- Spoon approximately one-third of the ice cream mixture into a suitable freezer-safe container or loaf tin.
- Add spoonfuls of the cooled raspberry coulis over the ice cream.
- Use a cake skewer or fork to gently swirl the coulis through the ice cream and create a ripple pattern.
- Add another portion of the ice cream mixture and repeat with more raspberry coulis and gentle swirling.
- Add the remaining ice cream mixture and finish with another layer of raspberry coulis and swirls.
- Cover the container and freeze for at least 4 hours, or until firm.
- Remove the ice cream from the freezer approximately 10–15 minutes before serving to make scooping easier.
Notes
- Fresh or frozen raspberries can be used. Frozen raspberries may produce a slightly thinner coulis because they can release additional water as they cook.
- The raspberry coulis can also be made with strawberries, blackberries, or blueberries while following the same basic preparation method.
- A loaf tin is convenient for freezing the ice cream, but any appropriately sized freezer-safe container can be used.
- Avoid overmixing the raspberry coulis into the ice cream. Gentle swirling creates clearer raspberry ribbons throughout the vanilla base.
- Serve in cones or bowls with an additional raspberry coulis drizzle and freeze-dried raspberries if desired.
- The ice cream can also be blended into a milkshake.
- Homemade ice cream may be firmer than commercial ice cream immediately after freezing. Allowing it to stand for 10–15 minutes before serving helps soften it slightly.
- Store covered in the freezer for up to 3 months. For the best quality and texture, it is ideally enjoyed within 1 month.


