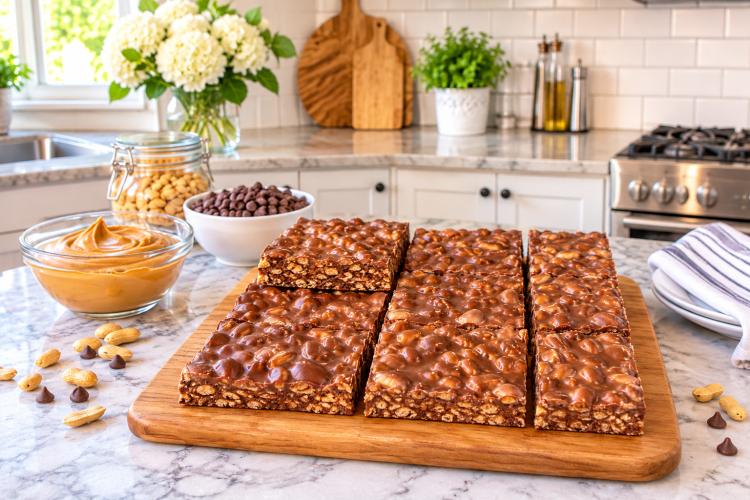
No-Bake Chocolate Peanut Butter Crunch Bars are a delicious homemade dessert that combines rich chocolate, creamy peanut butter, and crispy rice cereal in every bite. These easy chocolate crunch bars offer a wonderful balance of sweetness, crunch, and a touch of flaky sea salt. Best of all, they require no oven, making them a convenient choice for anyone who wants to prepare a satisfying dessert without spending hours in the kitchen.
Whether you need a quick afternoon snack, a sweet addition to lunchboxes, or a simple dessert for sharing, these no-bake chocolate peanut butter bars are an excellent option. Their crisp texture and smooth chocolate coating make them appealing to both children and adults. With a handful of familiar ingredients and a short preparation time, you can create a batch of homemade chocolate bars that taste wonderfully indulgent.
These homemade chocolate crunch bars are also easy to prepare ahead of time. Once the mixture has been chilled and cut into squares, the bars can be stored in the refrigerator or freezer until you are ready to enjoy them. This makes them especially useful for busy weekdays, unexpected guests, or those moments when a chocolate craving calls for something delicious and convenient.
What Makes These No-Bake Chocolate Crunch Bars So Special?
One of the best features of this no-bake chocolate dessert is its simplicity. Traditional baked desserts often require flour, eggs, baking powder, and a carefully controlled oven temperature. These chocolate peanut butter crunch bars skip all of those steps. Instead, melted chocolate, coconut oil, peanut butter, vanilla extract, and crispy rice cereal are combined to create a sweet treat that sets in the refrigerator or freezer.
The texture is what makes these bars particularly enjoyable. The chocolate and peanut butter create a smooth, rich coating, while the crispy rice cereal adds a light crunch. Every bite offers a satisfying contrast between the creamy chocolate mixture and the crisp cereal pieces. A small sprinkle of flaky sea salt on top brings out the chocolate flavor and balances the sweetness.
Another advantage is their versatility. These bars can be served as a dessert, an afternoon snack, or a homemade treat for special occasions. They are easy to cut into different sizes depending on how you want to serve them. Smaller squares work well for dessert platters, while larger bars are perfect for enjoying with a cup of coffee or tea.
Why You Will Love This Easy No-Bake Dessert
These no-bake chocolate peanut butter crunch bars are ideal for anyone who enjoys simple recipes with delicious results. Since there is no baking involved, the preparation process is straightforward and suitable for beginners. You only need to melt the chocolate, combine the ingredients, press the mixture into a pan, and allow it to chill until firm.
The recipe also uses common pantry ingredients. Chocolate chips, creamy peanut butter, coconut oil, vanilla extract, and crispy rice cereal are easy to find in most grocery stores. You do not need special baking equipment or complicated ingredients to make a dessert that looks and tastes impressive.
These bars are also convenient for meal preparation. You can make them in advance, store them properly, and enjoy them throughout the week. Their compact shape makes them easy to pack for lunch or serve at gatherings. Because they are kept chilled, they maintain their structure and crunchy texture when stored correctly.
For anyone looking for an easy homemade chocolate candy bar, this recipe provides a delicious alternative to packaged treats. The combination of chocolate and peanut butter gives the bars a familiar flavor, while the crispy cereal creates the crunch that makes them so enjoyable.
How to Make No-Bake Chocolate Peanut Butter Crunch Bars
Preparing these easy chocolate crunch bars is a simple process that requires only a few basic steps. The most important part is making sure the chocolate mixture is smooth and that the crispy rice cereal is evenly distributed before pressing everything into the pan.
Prepare the Baking Pan
Begin by lining a 9×5-inch loaf pan with parchment paper. The parchment paper makes it easier to remove the chilled chocolate mixture without breaking it. Leave a little extra paper hanging over the edges so you can lift the bars out once they have set.
If you do not have a loaf pan, an 8×8-inch square pan can also be used. The bars may be thinner when prepared in a larger pan, but they will still have the same delicious chocolate peanut butter flavor and crunchy texture.
Melt the Chocolate and Coconut Oil
Place the chocolate chips and coconut oil in a large microwave-safe bowl. Heat the mixture in 30-second intervals, stirring between each interval. Continue until the chocolate is completely melted and smooth.
Avoid heating the chocolate for too long at once. Chocolate can become overheated quickly, which may affect its texture. Stirring between intervals helps distribute the heat and encourages the chocolate to melt evenly.
Add Peanut Butter and Flavorings
Once the chocolate and coconut oil are smooth, add the creamy peanut butter, pure vanilla extract, and flaky sea salt. Stir everything together until the mixture becomes smooth and evenly combined.
At this stage, the chocolate mixture should have a creamy consistency that is easy to mix with the cereal. Make sure there are no visible streaks of peanut butter remaining, as an even mixture helps create consistent flavor throughout the bars.
Fold in the Crispy Rice Cereal
Add the crispy rice cereal to the chocolate peanut butter mixture. Use a spatula to gently fold the cereal into the chocolate, working carefully so that the cereal remains crisp and does not become crushed.
Continue mixing until the cereal is coated evenly. The mixture should look thick and textured, with crispy rice pieces distributed throughout the chocolate. Avoid stirring too aggressively because preserving the cereal’s structure is important for achieving a crunchy result.
Press the Mixture into the Pan
Transfer the chocolate cereal mixture into the prepared pan. Spread it evenly using a spatula, making sure the mixture reaches the corners of the pan.
Press the mixture firmly into place using the back of a spatula or the bottom of a measuring cup. An even layer helps the bars hold together after chilling and makes them easier to cut into neat squares.
Sprinkle a little additional flaky sea salt over the top if desired. This adds a pleasant finishing touch and enhances the sweet-and-salty flavor.
Chill Until Firm
Place the prepared pan in the freezer for approximately 15 minutes. This short chilling period allows the chocolate and coconut oil to firm up, making the bars easier to remove and slice.
Although the freezer is convenient for quick setting, the bars can also be chilled in the refrigerator if you prefer a slower process. The mixture should be firm enough to hold its shape before cutting.
Slice and Serve
Once the chocolate mixture has set, lift it out of the pan using the parchment paper. Place it on a cutting board and use a sharp knife to cut it into bars or squares.
For cleaner cuts, allow the bars to sit at room temperature for a few minutes if they are very firm. Wipe the knife between cuts if needed. Serve the bars chilled for the best texture and flavor.
Tips for Making the Best Chocolate Peanut Butter Crunch Bars
Use Fresh Crispy Rice Cereal
Fresh cereal is essential for achieving the crunchy texture that makes these bars special. If the cereal has been open for a long time, it may have absorbed moisture and become soft. Check the cereal before using it and choose a fresh package whenever possible.
Keep the cereal stored in an airtight container until you are ready to prepare the recipe. This helps protect its texture and ensures the finished bars remain crisp.
Melt the Chocolate Slowly
Chocolate can become thick or grainy if it is overheated. Using 30-second microwave intervals gives you better control over the melting process. Stir the chocolate between each interval, even if it still contains a few solid pieces.
The remaining chocolate will often melt as you stir. Gentle heating is the best way to achieve a smooth chocolate mixture for homemade no-bake desserts.
Do Not Skip the Coconut Oil
Coconut oil helps create a smooth chocolate mixture and contributes to the glossy finish of the bars. It also supports the setting process when the mixture is chilled.
The amount used in this recipe is small, but it is important for the final consistency. Keeping the ingredient proportions unchanged helps the bars set properly and maintain their texture.
Press the Mixture Evenly
Pressing the chocolate cereal mixture firmly into the pan helps the bars hold together. If the mixture is too loose or uneven, the bars may crumble when sliced.
Use a spatula or the flat bottom of a measuring cup to create a level surface. Pay attention to the corners and edges of the pan so that the bars have a consistent thickness.
Allow Enough Chilling Time
The bars need time to become firm before cutting. Although 15 minutes in the freezer is usually sufficient, the exact setting time can depend on the pan and the temperature of the ingredients.
If the mixture still feels soft, return it to the freezer for a few additional minutes. Cutting the bars before they are fully set can cause them to lose their shape.
Easy Ways to Customize Your Chocolate Crunch Bars
These chocolate peanut butter bars are delicious as written, but they can also be adapted with additional ingredients if you want to create a different flavor or texture. The original recipe provides a simple base that works well with a variety of optional additions.
Add Mini Marshmallows
Mini marshmallows can add a soft, chewy texture to the crunchy chocolate mixture. They create a different eating experience by combining crispy cereal with a light, sweet center.
If you choose to add marshmallows, fold them into the mixture gently. Avoid adding them while the chocolate is extremely hot, as excessive heat may cause them to melt.
Include Chopped Nuts
Chopped peanuts, almonds, or other nuts can provide an additional layer of crunch. They also complement the peanut butter flavor and make the bars feel more substantial.
For the best texture, use small pieces and distribute them evenly throughout the mixture. Keep in mind that adding nuts changes the original ingredient list, so they are best treated as an optional variation rather than part of the standard recipe.
Experiment with Chocolate Types
Different types of chocolate can change the overall flavor of the bars. Dark chocolate creates a richer taste, while milk chocolate gives a sweeter result. Semi-sweet chocolate is a balanced option that works well with creamy peanut butter.
If you are preparing the bars for a group, consider choosing a chocolate variety that suits the preferences of the people you are serving.
Can You Make These Chocolate Peanut Butter Bars Ahead of Time?
Yes, these no-bake chocolate crunch bars are an excellent make-ahead dessert. Their preparation process is quick, and the bars can be stored for later use without requiring additional cooking.
You can prepare a batch in advance and keep it refrigerated until needed. This is especially convenient when planning family gatherings, parties, lunchbox snacks, or holiday dessert platters. The bars can be cut into portions ahead of time, making serving simple and convenient.
Freezing is another useful option if you want to prepare the dessert well before an occasion. Store the bars in a sealed container and remove them as needed. Allow them to soften slightly before serving so that the chocolate texture is pleasant and easy to bite into.
Frequently Asked Questions
Do No-Bake Chocolate Peanut Butter Crunch Bars Need to Be Refrigerated?
Yes, refrigeration is recommended because it helps the chocolate and coconut oil remain firm. Store the bars in an airtight container in the refrigerator to maintain their shape and crunchy texture. They can be taken out shortly before serving, allowing them to soften slightly while remaining firm enough to handle.
Can I Use an 8×8-Inch Pan Instead of a Loaf Pan?
Yes, an 8×8-inch pan can be used if you do not have a 9×5-inch loaf pan. The larger pan will create a thinner layer, so the bars may be less thick than those made in the loaf pan. The flavor and overall texture will remain delicious.
How Long Do These No-Bake Chocolate Bars Take to Set?
The bars generally need around 15 minutes in the freezer to become firm enough for slicing. The exact time may vary depending on the temperature of the ingredients and the freezer. If the mixture is still soft, leave it in the freezer for a few additional minutes.
Can I Freeze Chocolate Peanut Butter Crunch Bars?
Yes, these bars freeze well when stored in an airtight, freezer-safe container. They can be kept frozen for up to one month. Place parchment paper between the layers to prevent sticking, and allow the bars to soften slightly before serving.
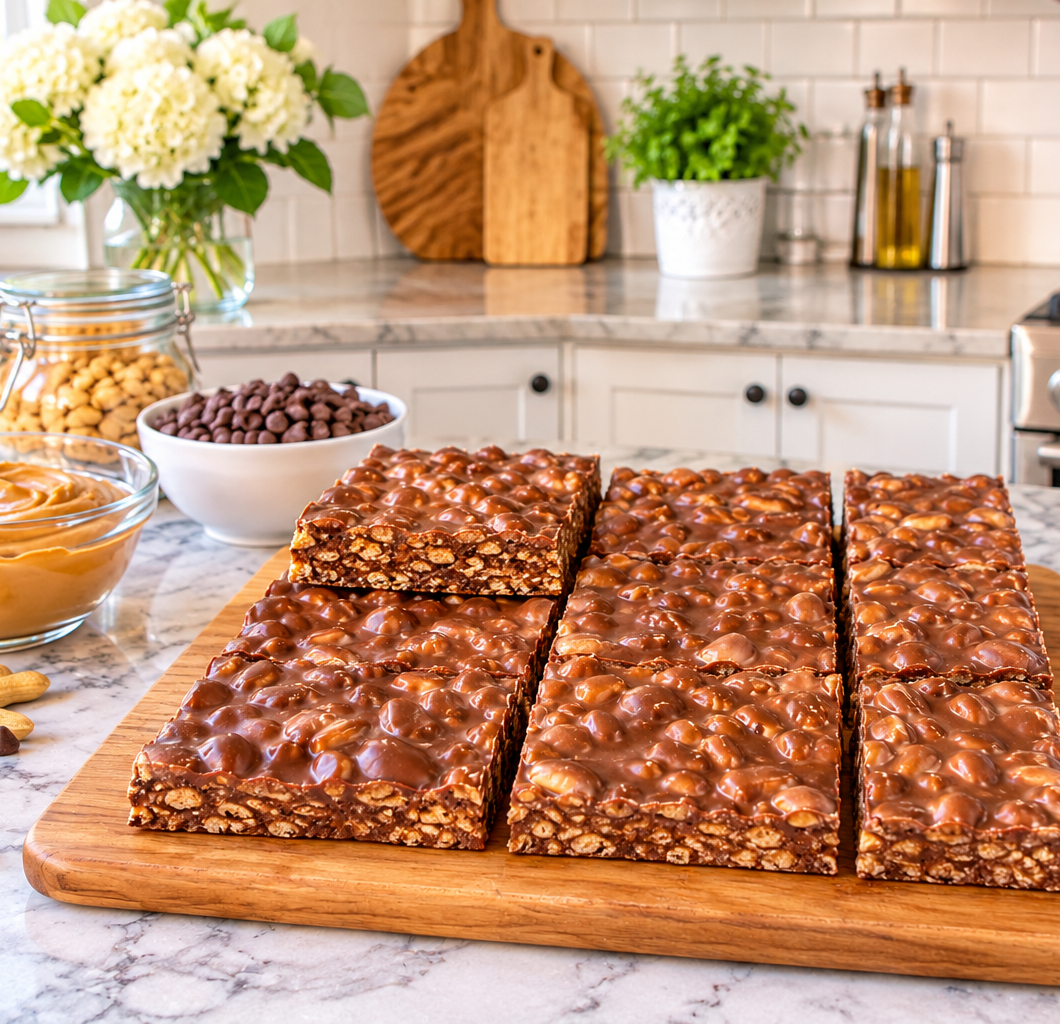
No-Bake Chocolate Peanut Butter Crunch Bars Dessert
 Recipe by admin1
These no-bake bars are a simple, delicious treat made with chocolate chips, creamy peanut butter, and crispy rice cereal.
12
servings25
minutes1
minute123
kcal26
minutesIngredients
1 cup chocolate chips
2 teaspoons coconut oil
1/3 cup creamy peanut butter
1 teaspoon pure vanilla extract
2 cups crisp rice cereal
1/4 teaspoon flaky sea salt, plus more for sprinkling
Directions
- Line a 9×5-inch loaf pan with parchment paper. An 8×8-inch pan can also be used.
- Place the chocolate chips and coconut oil in a large microwave-safe bowl. Heat in 30-second intervals, stirring between each, until smooth.
- Add the peanut butter, vanilla extract, and flaky sea salt. Stir until the mixture is smooth and evenly combined.
- Gently fold in the crispy rice cereal until all the cereal is coated with the chocolate mixture
- Press the mixture evenly into the prepared pan. Sprinkle additional flaky sea salt over the top if desired.
- Freeze for 15 minutes, or until the mixture is firm enough to cut.
- Lift the mixture from the pan using the parchment paper. Cut into bars with a sharp knife and serve.
Notes
- Storage: Keep in an airtight container in the refrigerator for up to 2 weeks.
- Freezer storage: Freeze in an airtight container for up to 1 month.
- Pan size: A 9×5-inch loaf pan creates thicker bars, while an 8×8-inch pan creates thinner bars.
- Cereal: Use fresh crispy rice cereal for the best texture.
Nutrition Facts
12 servings per container
- Amount Per ServingCalories123
- % Daily Value *
- Total Fat
7g
9%
- Total Carbohydrate
14g
6%
- Total Sugars 10g
- Protein 3g 6%
* The % Daily Value tells you how much a nutrient in a serving of food contributes to a daily diet. 2,000 calories a day is used for general nutrition advice.


