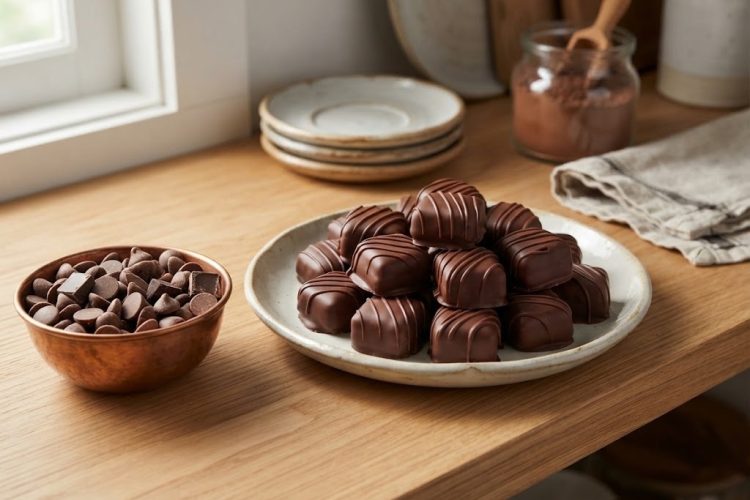
Homemade candy does not have to involve a long ingredient list, complicated techniques, or hours in the kitchen. These easy 2-ingredient chocolate candy bars are a great example of how simple a homemade sweet treat can be. Made with sugar-free chocolate chips and sugar-free Cool Whip, they have a soft, airy center surrounded by a smooth chocolate coating.
The result is a delicious low-carb candy that can satisfy a chocolate craving without requiring traditional caramel, nougat, or sugary fillings.
These homemade chocolate bars are especially useful for anyone following a keto or low-carb lifestyle and looking for a quick dessert that can be prepared ahead of time. The filling has a light, chewy texture that is reminiscent of the soft center found in popular chocolate candy bars.
Once chilled and coated with more melted chocolate, the pieces become firm enough to handle while remaining pleasantly soft inside. Because the recipe uses only two main ingredients, it is also easy to customize according to the type of chocolate you prefer.
Why These Homemade Chocolate Bars Work
The secret to the texture is the combination of melted sugar-free chocolate and sugar-free Cool Whip. Melted chocolate provides the rich chocolate flavor and structure, while the whipped topping gives the center its airy consistency. When these two ingredients are combined correctly, the mixture becomes light and fluffy instead of dense. After freezing, it can be cut into individual pieces and coated with another layer of chocolate to create a candy-bar-style finish.
Unlike many homemade candy recipes, there is no need to prepare a cooked sugar syrup, make traditional nougat, or use a candy thermometer. The process mainly involves melting chocolate, gently folding in the whipped topping, chilling the mixture, cutting it into pieces, and dipping those pieces in more chocolate. This makes the recipe approachable even if you have little experience making homemade candy.
The chilling stages are important because they help the soft filling become firm enough to cut and coat. The cold center also helps the outer chocolate coating set relatively quickly. For the best texture, allow enough time for the filling to become firm before slicing and coating.
Choosing the Right Sugar-Free Chocolate
The chocolate you choose can make a noticeable difference in both flavor and texture. For a low-carb or keto-friendly version, sugar-free semisweet or dark chocolate chips work well. Chocolate sweetened with monk fruit or allulose is generally a better choice for this particular preparation because some chocolate products sweetened with erythritol or stevia can become grainy or develop a slightly chalky appearance after melting.
Different brands also behave differently when heated. Some sugar-free chocolate becomes very fluid when melted, which makes it ideal for dipping. Other varieties may remain thicker and require a little help to reach a smooth coating consistency. The recipe allows for optional melted coconut oil if the chocolate needs to be thinned for easier dipping.
If you are not following a low-sugar or low-carb diet, regular semisweet or dark chocolate chips can also be used. The recipe concept remains the same, although the nutritional values will naturally change depending on the chocolate selected.
The Role of Sugar-Free Cool Whip
Sugar-free Cool Whip is an important part of the filling because it creates the soft and airy texture that makes these candies different from ordinary chocolate-covered treats. The whipped topping contributes volume and lightness while helping the chocolate center remain softer than a solid chocolate filling.
Regular whipped cream can be used as an alternative if sugar-free Cool Whip is unavailable. However, the finished texture will not be exactly the same. Whipped cream does not contain the same stabilizing ingredients found in Cool Whip, so it reacts differently when exposed to melted chocolate and when frozen.
With regular whipped cream, the mixture needs to be handled particularly gently. The melted chocolate must be cooled sufficiently before combining it with the whipped cream. If the chocolate is too warm, it can cause the cream to lose its airy structure. The finished candy may also become much firmer in the freezer and will generally need some time to soften before serving.
How to Make the Soft Chocolate Filling
Start by preparing an 8-inch by 4-inch loaf pan with parchment paper. Allow some parchment to extend beyond the sides of the pan. This overhang makes it much easier to lift the chilled chocolate mixture out later without having to pry it from the pan.
The first portion of chocolate is melted gradually in the microwave. Short heating intervals are preferable because chocolate can become overheated very quickly. Stir the chocolate between each interval, allowing the remaining heat to continue melting the pieces. Continue until the chocolate is completely smooth.
One of the most important steps is allowing the melted chocolate to cool to room temperature. It should not be hot when it comes into contact with the Cool Whip. At the same time, the whipped topping should also be allowed to come closer to room temperature. Combining very hot chocolate with cold whipped topping can cause problems with the texture and may cause the chocolate to seize.
Once the temperature is suitable, gently fold the Cool Whip into the melted chocolate. Use a spatula and work carefully rather than stirring aggressively. The goal is to combine everything evenly while retaining the light texture of the whipped topping. When finished, the mixture should have a consistent chocolate color and a fluffy appearance.
Chilling and Cutting the Candy
Transfer the chocolate filling to the parchment-lined loaf pan and spread it into an even layer. An offset spatula is useful for smoothing the surface, but you can also use an ordinary spatula if that is what you have available.
Place the pan in the freezer until the mixture becomes firm enough to handle. This usually takes at least 30 minutes, although the exact time can vary depending on the freezer and the thickness of the filling. The center does not need to become completely frozen at this stage; it simply needs enough firmness to be removed and cut cleanly.
Once firm, use the parchment overhang to lift the chocolate mixture from the pan. Place it on a cutting board and cut it into approximately 1-inch squares. You can make larger pieces if you prefer a more substantial candy-bar size. Keep the pieces on a parchment-lined baking sheet and return them to the freezer for another short chilling period.
This additional freezing step is useful because the pieces need to be very cold before they are dipped into melted chocolate. A firm center is easier to coat and helps the outer chocolate set more quickly.
Creating the Chocolate Coating
The remaining chocolate chips are melted using the same gentle microwave method. Heat them in short intervals and stir thoroughly between each one. Avoid overheating the chocolate because excessive heat can affect its consistency and make coating more difficult.
If your melted chocolate is thick, a small amount of melted coconut oil can be added to loosen it. This is optional rather than essential. Some chocolate brands naturally become thin and fluid after melting, so additional oil may not be necessary.
For coating, two forks work well. Place one chilled candy square into the melted chocolate and carefully turn it until every side is covered. Lift it from the bowl and allow excess chocolate to drip away before transferring it to the parchment-lined baking sheet.
As the coating settles, a small amount of chocolate may collect around the base of each candy. You can gently remove or break away excess chocolate once it begins to set. This creates a cleaner appearance and gives the finished pieces a more polished candy-bar look.
Making the Candy Bars Look More Special
Although the finished candies are delicious with a simple chocolate coating, you can give them a decorative finish with a chocolate drizzle. If there is enough melted chocolate left after dipping, drizzle a small amount over the tops of the coated pieces using a spoon or a piping bag. This creates a simple homemade candy-shop appearance without adding another ingredient to the actual recipe.
For the best presentation, place the finished pieces on parchment paper with a little space between each one. Allow the chocolate coating to become completely firm before transferring the candies to a storage container.
Storage and Serving Suggestions
These homemade chocolate candy bars are particularly convenient because they can be prepared in advance. Once completely set, store any uneaten pieces in the freezer. Keeping them frozen helps preserve the texture of the chocolate shell and soft filling.
Because the filling contains a whipped topping, storage conditions matter. Keep the candies properly chilled rather than leaving them at room temperature for an extended period. When you are ready to enjoy one, you can eat it chilled for a firmer texture or allow it to sit briefly depending on your preferred consistency.
For a keto-friendly dessert spread, these chocolate squares can be served after dinner, alongside coffee, or as a small sweet snack. Their compact size also makes portion control easier because each piece can be enjoyed individually.
Frequently Asked Questions
Can I make these candy bars without Cool Whip?
Yes, regular whipped cream can be used when sugar-free Cool Whip is unavailable. However, the texture will be different because regular whipped cream does not contain the same stabilizers. The filling may become harder when frozen and softer when exposed to warmth, so allow the candy to defrost slightly before serving.
Are these chocolate candy bars keto-friendly?
They can be suitable for a keto or low-carb eating plan when made with appropriate sugar-free chocolate chips and sugar-free Cool Whip. The exact nutritional values depend on the brands and products used. Always check the nutrition label of your chosen ingredients if you are carefully tracking carbohydrates.
Why did my melted chocolate become thick?
Sugar-free chocolate products vary considerably in their melting behavior. Some varieties become very smooth and fluid, while others remain thick. If the chocolate is difficult to use for dipping, a small amount of melted coconut oil can help thin it. Add it gradually so the coating does not become excessively thin.
How should I store the finished candy?
Store the finished candy bars in the freezer in an airtight container. Keeping them frozen helps maintain the chocolate coating and filling. If using regular whipped cream, allow the pieces to soften slightly before eating for a lighter texture.
Can I make larger candy bars?
Absolutely. The filling can be cut into larger squares or rectangles instead of 1-inch pieces. Larger pieces will give you a more traditional candy-bar-style portion, while smaller squares are convenient for bite-sized treats.
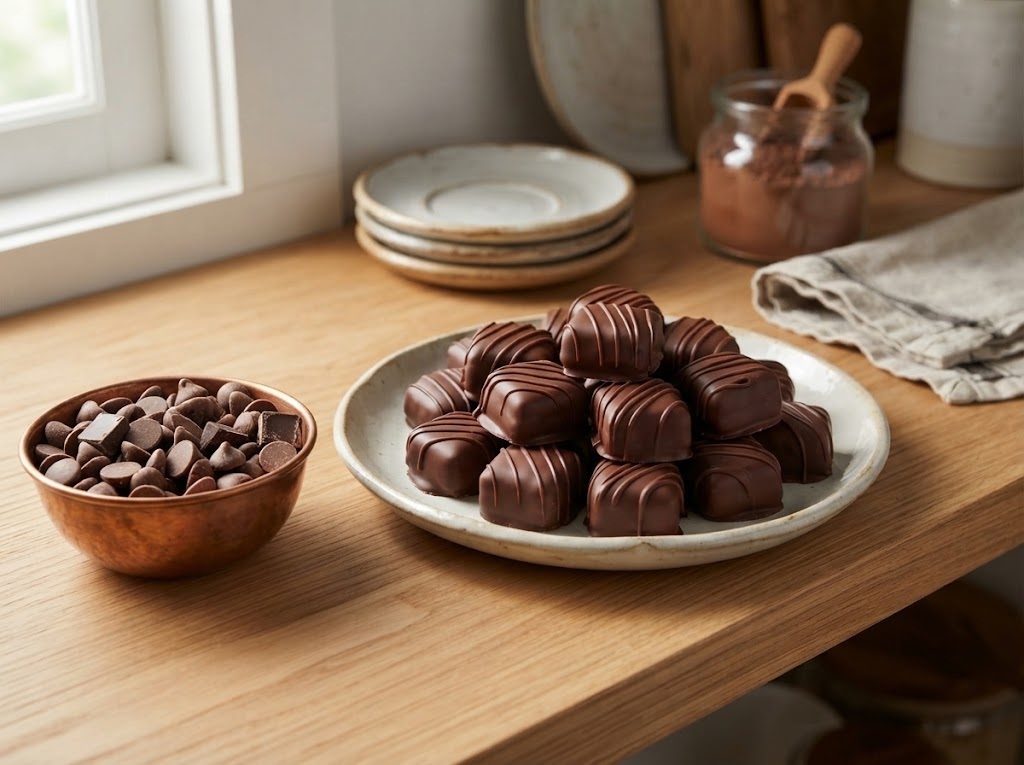
Keto Chocolate Nougat candy
 Recipe by admin1
Easy homemade chocolate candy bars made with sugar-free chocolate chips and sugar-free Cool Whip. These low-carb treats feature a soft, airy chocolate filling covered in a smooth chocolate coating and can be prepared in just a few simple steps.
21
servings15
minutes96
kcal15
minutesIngredients
2 1/2 cups (410 g) sugar-free semisweet or dark chocolate chips, divided
4 oz (113 g) sugar-free Cool Whip, thawed in fridge
Directions
- Line an 8-inch x 4-inch loaf pan with parchment paper, leaving enough paper extending over the sides so the chilled mixture can be lifted out easily.
- Place 1.5 cups of the chocolate chips into a microwave-safe bowl. Microwave in 15–30 second intervals, stirring well between each interval, until the chocolate is completely melted and smooth.
- Set the melted chocolate aside and allow it to cool to room temperature for approximately 10–15 minutes. During this time, remove the Cool Whip from the refrigerator so it can also come closer to room temperature.
- Make sure the chocolate is not hot before combining it with the Cool Whip. Warm chocolate can melt the whipped topping, while very cold Cool Whip can cause the chocolate to seize.
- Once the chocolate has cooled, gently fold in the Cool Whip using a spatula. Continue folding until the mixture is evenly combined, light, fluffy, and consistent in color.
- Transfer the mixture to the prepared loaf pan. Spread it into an even layer using a spatula or offset spatula.
- Place the pan in the freezer for at least 30 minutes, or until the mixture is firm enough to remove and cut.
- Lift the chilled mixture from the pan using the parchment paper overhang. Place it on a cutting board and cut it into approximately 1-inch squares, or make larger pieces if preferred.
- Arrange the squares on a parchment-lined baking sheet and return them to the freezer for approximately 20–30 minutes, allowing them to become thoroughly cold and firm.
- Place the remaining 1 cup of chocolate chips in a microwave-safe bowl. Melt them in 15–30 second intervals, stirring between each interval until completely smooth.
- If necessary, add a small amount of melted coconut oil to thin the chocolate and make coating easier. This is optional and depends on the consistency of the chocolate being used.
- Using two forks, dip each chilled square into the melted chocolate. Turn it carefully so the entire piece is coated.
- Allow excess chocolate to drip back into the bowl before placing each coated candy onto the parchment-lined baking sheet. Remove or break away any excess chocolate that gathers around the bottom of the pieces.
- If desired, drizzle additional melted chocolate over the tops of the finished candy bars for decoration.
- Place the coated candies back into the refrigerator or freezer until the chocolate is completely set. Store any remaining candy bars in the freezer.
Nutrition Facts
- Total number of serves: 1
- Calories: 96kcal
- Fat: 8g
- Carbohydrates: 13g
- Fiber: 10g


