Few desserts have captured the hearts of sweet lovers worldwide quite like the iconic McFlurry from McDonald’s. Creamy, cold, and irresistibly crunchy thanks to the colorful M&Ms, this delightful treat blends the best of ice cream and candy into one spoonful of happiness. The good news? You don’t have to visit McDonald’s every time you crave one. With this homemade McDonald’s-style M&M McFlurry recipe, you can recreate the same creamy texture and chocolatey crunch right in your kitchen — and it’s even better because you can control the ingredients and customize it to your taste!
This easy recipe captures the signature flavor and texture of the original McFlurry using simple household ingredients and your trusty Thermomix, blender, or food processor. Let’s walk through every detail to ensure your homemade McFlurry rivals the fast-food classic in both taste and presentation.
🍦 Why You’ll Love This Homemade McFlurry
Making your own M&M McFlurry at home has several advantages beyond convenience and cost-saving:
-
Creamier and fresher: Homemade versions often have a richer flavor and smoother texture than the store-bought version.
-
Customizable: Add more or fewer M&Ms, throw in Oreos, or drizzle extra chocolate syrup — it’s your dessert!
-
No preservatives: You’re using real milk, eggs, and sugar without artificial stabilizers.
-
Budget-friendly: Make multiple servings for the cost of one McDonald’s cup.
-
Fun for all ages: Kids love watching their favorite candies swirl into the creamy base!
🧁 Ingredients You’ll Need
Here’s everything you’ll need to create your McFlurry M&M McDonald’s style at home:
-
15 g vanilla sugar (or 1 teaspoon pure vanilla extract)
-
140 g granulated sugar
-
6 large eggs
-
1 packet M&M candies (regular or peanut, your choice)
-
5 Oreo cookies
-
Chocolate syrup, for topping
-
1000 g (1 liter) whole milk
These simple ingredients form a creamy custard-style base that freezes into a rich, smooth ice cream — perfect for mixing with crushed cookies and candies.
👩🍳 Step-by-Step Directions
Step 1: Prepare the Ice Cream Base
The secret behind the McFlurry’s creamy texture lies in its base — a rich blend of milk, eggs, and sugar, infused with the delicate flavor of vanilla.
In your Thermomix bowl, combine the following:
-
1 liter milk
-
6 eggs
-
140 g sugar
-
15 g vanilla sugar or 1 tsp vanilla essence
Set the Thermomix to:
10 minutes / 90°C / Speed 4
This process gently heats and blends the mixture, creating a silky smooth custard that will later transform into the creamy McFlurry base.
If you don’t have a Thermomix, you can prepare this on the stovetop by whisking the ingredients over medium heat until thickened slightly (do not boil).
Step 2: Freeze the Mixture
Once your custard base is ready, pour it into a freezer-safe container. Cover tightly with a lid or cling film to prevent ice crystals from forming.
Place it in the freezer for 24 hours to solidify completely. This will form your homemade ice cream base.
Step 3: Crush the M&Ms and Oreos
After 24 hours, it’s time to add the magic — the iconic mix-ins!
Add your M&M candies and Oreo cookies to the Thermomix bowl (or blender).
Use 2 Turbo pulses to crush them into small chunks — not powdery, but broken enough to mix evenly into the ice cream.
If you don’t have a Thermomix, you can place the candies and cookies in a ziplock bag and crush them gently with a rolling pin.
Step 4: Blend the Ice Cream Base
Take the frozen mixture from the freezer and add it to your Thermomix bowl.
Program for 40 seconds / Speed 6.
If the texture isn’t smooth enough, repeat the process for another 20–30 seconds until you reach that creamy McFlurry consistency — thick but scoopable.
This step is crucial, as it breaks down the frozen custard and aerates it, giving it that signature McDonald’s soft-serve texture.
Step 5: Whip to Perfection
Attach the whisk attachment and blend again for 1 minute / Speed 4.
This final whisking gives your McFlurry its light, airy texture and ensures every bite melts smoothly on your tongue.
Step 6: Divide and Flavor
Now comes the fun part — flavoring!
Divide the ice cream mixture into two equal portions:
-
One for your M&M McFlurry
-
One for your Oreo McFlurry
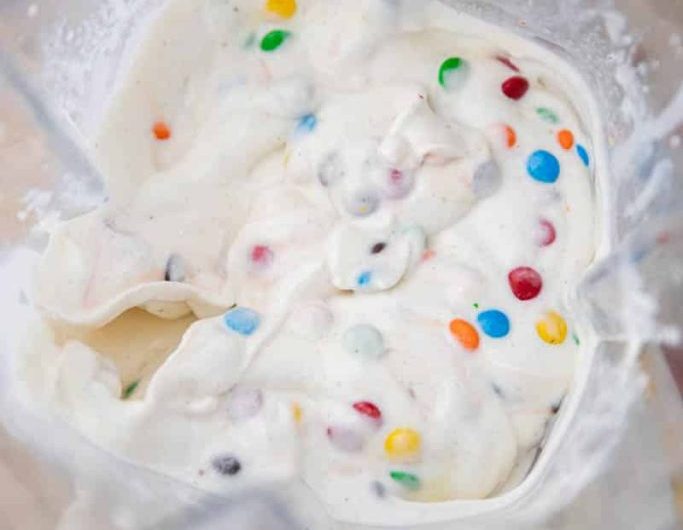
Mix the crushed M&Ms into one portion and the crushed Oreos into the other.
You now have two McDonald’s-style McFlurry flavors — perfect for sharing or indulging!
Step 7: Serve and Garnish
Spoon your McFlurrys into glasses or dessert cups.
Top with extra M&Ms, Oreo crumbs, and a generous drizzle of chocolate syrup for the ultimate presentation.
Serve immediately with a long spoon and enjoy the nostalgic sweetness of your homemade McFlurry.
🍬 Tips for the Perfect Homemade McFlurry
-
Use cold ingredients: Chilled milk and eggs help create a smoother texture.
-
Don’t overheat the base: Keep the mixture below boiling to avoid curdling.
-
Crush mix-ins gently: You want bits of candy and cookies in every bite.
-
Experiment with toppings: Try caramel syrup, crushed KitKat, or mini marshmallows.
-
Serve slightly soft: Let your McFlurry sit at room temperature for 5 minutes before serving for the creamiest texture.
🍨 Variations & Fun Flavors
Once you’ve mastered the classic M&M version, the sky’s the limit! Try these fun McFlurry twists:
-
Snickers McFlurry: Replace M&Ms with chopped Snickers bars and drizzle caramel.
-
Nutella McFlurry: Swirl in 2 tablespoons of Nutella before freezing.
-
Mint Oreo McFlurry: Use mint extract and green M&Ms for a refreshing twist.
-
Strawberry Dream: Mix in crushed freeze-dried strawberries and white chocolate.
-
Peanut Butter Crunch: Add a spoonful of peanut butter and chopped Reese’s.
🧊 Storage Instructions
You can store your homemade McFlurry in the freezer for up to 5 days.
Storage Tips:
-
Keep it in an airtight container to prevent freezer burn.
-
When ready to serve, thaw for 10 minutes at room temperature.
-
Stir well before scooping to restore creaminess.
❓ Frequently Asked Questions
Q1: Can I make this without a Thermomix?
Yes! You can use a regular blender or food processor to mix the ingredients and crush the candies. For the custard base, whisk on the stovetop over medium heat until it slightly thickens.
Q2: Can I use different types of M&Ms?
Absolutely! Try peanut, crispy, caramel, or pretzel M&Ms for fun variations.
Q3: Do I need an ice cream maker?
No, this recipe doesn’t require one. The freezing and blending steps create the creamy McFlurry texture without extra equipment.
Q4: How long will it last in the freezer?
Your McFlurry will keep its flavor and texture for about 3–5 days if stored properly.
Q5: Can I reduce the sugar?
Yes, you can reduce the sugar slightly, but be aware that it helps prevent ice crystals. Using less may affect texture.
💡 Pro Tip for a Healthier Version
Want to lighten up your McFlurry? Try using:
-
Low-fat milk or almond milk instead of whole milk.
-
Sugar substitutes like stevia or erythritol.
-
Dark chocolate chips instead of M&Ms.
This will give you a lighter yet still delicious treat.
McDonald’s-Style M&M McFlurry
Prep Time: 10 minutes
Freeze Time: 24 hours
Total Time: 24 hours 10 minutes
Servings: 4
Ingredients:
-
15 g vanilla sugar (or 1 tsp vanilla extract)
-
140 g sugar
-
6 eggs
-
1 packet M&M candies
-
5 Oreo cookies
-
Chocolate syrup (for garnish)
-
1000 g (1 L) milk
Instructions:
-
In Thermomix, combine milk, eggs, sugar, and vanilla sugar. Mix 10 min / 90°C / Speed 4.
-
Pour into a container and freeze for 24 hours.
-
Crush M&Ms and Oreos with 2 Turbo pulses.
-
Add frozen mixture to Thermomix and mix 40 sec / Speed 6.
-
Attach whisk and mix again 1 min / Speed 4.
-
Divide mixture: one half with M&Ms, one half with Oreos.
-
Serve in cups, top with chocolate syrup and extra toppings.


